To enhance your Wi-Fi coverage, you need to perform the Linksys RE4100W Setup . This involves activating the extender by powering it on, accessing the Linksys Extender Setup page, and configuring both the essential and advanced settings. Once you’ve completed this setup, you’ll effectively eliminate Wi-Fi dead zones, resulting in an extended and improved network coverage.
Linksys RE4100w Extender Manual Setup
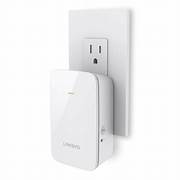
To effectively expand the coverage and range of your existing wireless network, the dual-band Wi-Fi range extender, Linksys RE4100w Setup, can be used. You can manually set it up by following these steps:
- Plug the Linksys RE4100w Setup into a functional electrical outlet to begin.
- Join the Wi-Fi network provided by the extender with your computer or mobile device.
- Open your preferred web browser, such as Internet Explorer or Chrome.
- In the browser’s address bar, enter one of the standard web URLs for Linksys Extender, either “192.168.1.1” or “extender.linksys.com.”
- The login screen for the Linksys RE4100w extender will now appear.
- When prompted, input your username and password.
- Follow the on-screen instructions to complete the Linksys RE4100w Extender configuration.
- Configuration is finished when all three green LED lights on the extender are illuminated.
You can manually configure your Linksys RE4100w Extender by following these steps. In case of any setup issues, you may also consider using the WPS push button method as an alternative.
Linksys RE4100w Extender WPS Setup
Follow these simple instructions to set up your Linksys RE4100w Extender WiFi range extender using WPS, the most straightforward method for expanding your host network:
- Plug the extender into an electrical outlet, power it up, and allow it to initialise.
- Locate the WPS button on your Linksys Extender, typically found on the front or side of the device.
- Press and hold the WPS button on the extender for approximately 2 seconds.
- During this process, the WPS LED light will start flashing.
- Once the procedure is complete, both the extender and router LEDs will stabilise.
Congratulations, you have successfully completed the Linksys RE4100w Setup using WPS. If you have any questions or require assistance with your extender, please don’t hesitate to reach out to us for support.
Configuration issues with the Linksys RE4100w Extender: troubleshooting tips
You can resolve Linksys RE4100w Extender login issues with the following troubleshooting methods:
- Confirm that the extender’s LED indicators are illuminated, indicating it’s powered on.
- Position the extender within the optimal range of your router.
- Try restarting both your primary router and the extender.
- Visit the Linksys website to verify that your extender’s firmware is up-to-date.
- Ensure you have the correct Wi-Fi password before reconnecting your devices to the extender’s network.
- To minimise interference, consider changing the Wi-Fi channel on your extender.
- If issues persist, use the reset button on the extender for a factory reset.
- Ensure that your extender is not placed near electronic devices that could interfere with the signal.
- Examine the extender for any physical damage or loose connections.
If you continue to experience problems, don’t hesitate to reach out to Linksys RE4100w customer service for further assistance.
How can I upgrade the firmware on my Linksys RE4100w Extender?
To potentially enhance the performance of your Linksys RE4100w setup and address any issues, it’s important to update the firmware. Here are the steps to update the firmware on your Linksys RE4100w extender:
- Connect your PC to the Linksys RE4100w Extender’s network.
- Open a web browser and enter the default IP address of the Linksys RE4100w Extender into the address bar.
- Use “admin” as your password when logging in.
- Navigate to the “Administration” tab and select “Firmware Upgrade” to check for available updates.
- Download the latest firmware version and save it to your computer.
- Ensure that the extender is powered on during the firmware update process.
- Once the firmware upgrade is complete, the Linksys RE4100w Extender will automatically restart.
- Re-login to the device’s web interface to confirm the firmware update.
By following these steps, you can successfully update the firmware on your Linksys RE4100w extender, which may improve performance and resolve issues.
How can a Linksys RE4100w Extender be reset?
You might need to restore your Linksys RE4100w extender to factory default settings if it isn’t operating properly.
- Plug the Linksys RE4100w Extender in first to perform a reset.
- Find your extender’s reset button; it’s typically a little hole on the gadget.
- Use a paperclip or other similar device to press and hold the reset button for approximately ten seconds.
- Keep holding the button and look at the extender’s LED lights. They might flash while doing this.
- After around 10 seconds, the reset button should be released.
- Hold off till the extender restarts. This could take one or two minutes.
- The extender will have been reset to its factory default settings after restarting.
Keep in mind that when you reset your extender, all of your unique options are lost, so you’ll need to configure it from scratch once more.