Introduction
A leaking roof can be a homeowner’s nightmare, leading to water damage, mold growth, and structural issues. Fixing a leaking roof promptly is crucial to prevent further damage and costly repairs. In this guide, we’ll walk you through the steps to identify, temporarily fix, and permanently repair a leaking roof.
Identifying the Leak
Inspecting the Interior
The first step in repairing a leaking roof is to locate the source of the leak. Start by inspecting the interior of your home. Look for water stains on ceilings and walls, which are telltale signs of a leak. Pay close attention to areas around chimneys, vents, and skylights.
Checking the Attic
Next, head to the attic. Use a flashlight to check for damp insulation, water stains, or mold. Follow the water trail back to the point where it enters the roof. This can help you pinpoint the location of the leak.
Examining the Roof Exterior
Once you have an idea of where the leak might be, it’s time to inspect the roof exterior. Look for damaged or missing shingles, cracked flashing, or any other signs of wear and tear. This is where the leak is most likely originating.
Gathering Necessary Tools and Materials
Essential Tools
Before you start repairing your roof, gather the necessary tools:
- Ladder
- Flashlight
- Hammer
- Roofing nails
- Utility knife
- Pry bar
- Caulking gun
Recommended Materials
You’ll also need some materials for the repair:
- Replacement shingles
- Roofing cement
- Roofing nails
- Metal flashing
- Roofing felt
- Tarp (for temporary fixes)
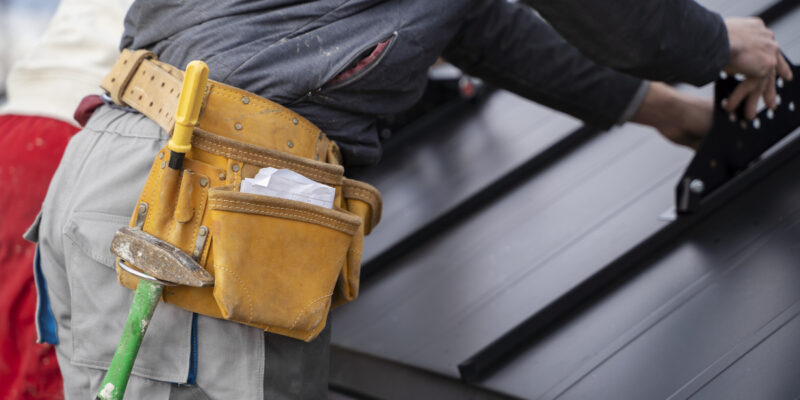
Safety Precautions
Personal Protective Equipment
Roof repair can be dangerous, so safety should be your top priority. Wear sturdy shoes with good traction, a helmet, and gloves. Ensure your ladder is stable and secure before climbing.
Weather Considerations
Never attempt to repair your roof during adverse weather conditions. Wait for a dry, calm day to reduce the risk of accidents and ensure the effectiveness of your repairs.
Temporary Fixes
Using a Tarp
If you’re unable to make permanent repairs immediately, a tarp can provide a temporary solution. Secure the tarp over the damaged area with roofing nails or screws. Ensure it covers the entire affected section to prevent further water ingress.
Applying Roofing Cement
For small leaks, roofing cement can offer a quick fix. Apply the cement to the leaking area and spread it evenly using a putty knife. This should hold until you can make a more permanent repair.
Permanent Repairs
Fixing Shingle Roofs
Replacing Damaged Shingles
Start by removing the damaged shingles. Use a pry bar to lift the shingles and pull out the nails. Slide the new shingle into place and secure it with roofing nails.
Sealing Shingle Gaps
If the shingles are intact but there are gaps, use roofing cement to seal them. Apply the cement under the edges of the shingles and press them down firmly.
Repairing Metal Roofs
Patching Holes
For metal roofs, patching holes is straightforward. Clean the area around the hole, apply a metal patch with roofing cement, and seal the edges.
Sealing Seams
If the leak is coming from a seam, clean the area and apply a seam sealer. This will prevent water from seeping through the joints.
Flat Roof Repairs
Applying a New Membrane
For flat roofs, you may need to apply a new membrane. Clean the roof surface, apply roofing adhesive, and roll out the new membrane. Smooth out any air bubbles and ensure it adheres properly.
Sealing Cracks and Holes
Use roofing cement to seal any cracks or holes on a flat roof. Apply the cement generously and spread it evenly for a watertight seal.
Preventative Maintenance
Regular Inspections
Regular roof inspections can help you catch issues before they become major problems. Check your roof at least twice a year and after any severe weather events.
Cleaning Gutters and Downspouts
Clogged gutters can lead to water pooling on your roof, causing leaks. Clean your gutters and downspouts regularly to ensure proper water drainage.
Trimming Overhanging Branches
Overhanging branches can damage your roof and lead to leaks. Trim any branches that are too close to your roof to prevent potential problems.
Dealing with Severe Damage
When to Call a Professional
If your roof has sustained severe damage or if you’re unsure about making the repairs yourself, it’s best to call a professional roofer. They have the expertise and equipment to handle complex repairs safely.
Estimating Repair Costs
The cost of roof repairs can vary widely depending on the extent of the damage and the type of roof. Get multiple estimates from reputable contractors to ensure you’re getting a fair price.
Conclusion
Repairing a leaking roof may seem daunting, but with the right tools, materials, and know-how, you can tackle the job yourself. Regular maintenance and inspections are key to preventing leaks and extending the life of your roof. Remember, safety first – if in doubt, call a professional like Lexington Roofing Company.