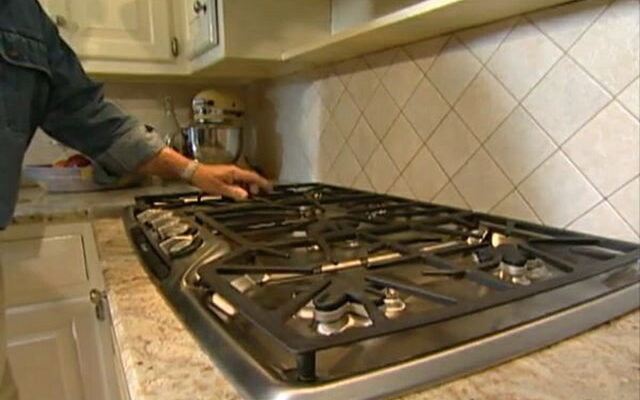
Gas cooktops are a popular choice among homeowners for their precision cooking and efficiency. However, installing a gas cooktop requires careful attention to safety and proper procedures. Whether you’re upgrading your kitchen or replacing an old appliance, understanding the installation process is crucial. In this comprehensive guide, we’ll walk you through everything you need to know about gas cooktop installation to ensure a smooth and safe experience.
- Pre-Installation Preparations: Before diving into the installation process, it’s essential to make necessary preparations. Start by selecting the right location for your gas cooktop, ensuring it’s well-ventilated and accessible. Clear out the area and remove any existing appliances to provide ample space for installation. Additionally, check local building codes and regulations regarding gas appliance installation to ensure compliance.
- Gathering Tools and Materials: To streamline the installation process, gather all the necessary tools and materials beforehand. You’ll typically need a pipe wrench, adjustable wrench, pipe thread compound, gas leak detector solution, flexible gas line, shut-off valve, and Teflon tape. Having these items readily available will save you time and ensure a smoother installation process.
- Shut Off Gas Supply: Safety should always be the top priority when working with gas appliances. Before starting the installation, shut off the gas supply to the area where the cooktop will be installed. Locate the main gas valve and turn it off to prevent any potential leaks or accidents during the installation process.
- Prepare the Installation Area: Once the gas supply is turned off, prepare the installation area by cleaning the countertop surface and ensuring it’s level. Remove any debris or obstacles that may hinder the installation process. If necessary, consult a professional to make any adjustments to the countertop to accommodate the new cooktop.
- Install the Gas Line: Next, it’s time to install the gas line that will supply fuel to the cooktop. Begin by measuring and cutting the flexible gas line to the appropriate length, ensuring it reaches from the gas supply line to the cooktop location. Use a pipe cutter to make clean, precise cuts, and attach the flexible gas line to the shut-off valve using a pipe wrench. Apply pipe thread compound to the threaded connections to create a secure seal.
- Connect the Cooktop: With the gas line in place, carefully position the gas cooktop over the installation area. Align the cooktop with the opening in the countertop and ensure it sits flush. Connect the flexible gas line to the inlet on the underside of the cooktop, tightening the connection securely with an adjustable wrench. Double-check all connections to ensure they are tight and leak-free.
- Test for Gas Leaks: Once the gas cooktop is installed, it’s crucial to test for any potential gas leaks before using the appliance. Apply a small amount of gas leak detector solution to each connection point, including the shut-off valve, gas line connections, and cooktop inlet. If bubbles form or the solution changes color, it indicates a leak that requires immediate attention. Tighten the connections as needed and retest until no leaks are detected.
- Secure the Cooktop: After confirming there are no gas leaks, secure the gas cooktop in place using the provided mounting brackets or screws. Follow the manufacturer’s instructions for securing the cooktop to the countertop to ensure stability and safety during use. Avoid over-tightening the screws to prevent damage to the appliance or countertop surface.
- Final Checks and Adjustments: Before using the gas cooktop, perform a final inspection to ensure everything is in working order. Double-check all connections, knobs, and controls to ensure they are secure and functioning correctly. Test each burner individually to verify proper ignition and flame quality. Make any necessary adjustments or repairs before using the cooktop to avoid potential hazards or malfunctions.
- Professional Assistance: While DIY installation is possible for some homeowners, it’s always recommended to seek professional assistance, especially if you’re unfamiliar with gas appliance installation or unsure about any step of the process. A qualified technician can ensure the installation is done safely and according to local regulations, minimizing the risk of accidents or issues down the line.
In conclusion, gas cooktop installation requires careful planning, attention to detail, and adherence to safety protocols. By following the steps outlined in this guide and consulting with professionals when needed, you can enjoy the benefits of your new gas cooktop safely and efficiently.
What's your reaction?
Excited
0 Happy
0 In Love
0 Not Sure
0 Silly
0


