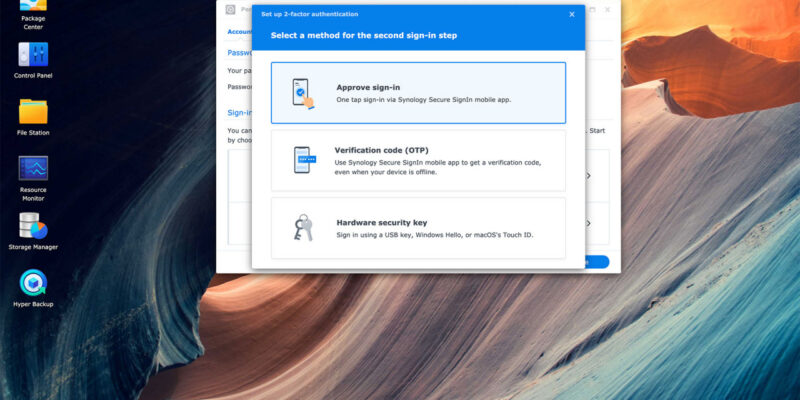
You can approve the 2FA (two factor authentication) from the DSM (DiskStation Manager) software using your computer. If you don’t have installed the DSM software in your computer system then you have to install it first and then set up the Synology two factor authentication. Here, we will walk you through the DSM installation process and then we will explain you how to set up the two factor authentication by DSM. Let’s start with how to install the DiskStation Manager.
How to Install DSM (DiskStation Manager) Software?
Turn On Your Synology Device
To install the DSM software, you have to reach the Web assistant of the NAS device through your computer. Start with turning the device on, then connect it with your router, hub or switch and power it on, insert its power cord into a wall socket. Then, just press the power button to turn it on.
Connect Computer to Same Network
Now, link your computer to the same network, in which the Synology device is connected. Then open up any internet browser to access the Web Assistant by typing the URL find.synology.com into the address bar. You enter into the web assistant; here you have to click on the Connect button to connect to the NAS device. You will see a download page, where you can download the DSM software.
Install DiskStation Manager
After downloading the DSM, just install it in your computer. Sign up into the software, by entering the device name, Admin id and password. Then, click the Save button to save the credentials you have filled.
Now, let’s take a look on some simple steps to setup and approve Synology two factor authentication using DSM.
How to Set up Two Factor Authentication?
1. Find 2-Factor Authentication
To setup 2FA, you have to approve it using the DSM. The first step would be, signing into the DSM and find Personal tab on the dashboard of the DSM software and Locate the Security option on the Personal tab. Here you will see the 2-Factor Authentication.
2. Approve Security Key
Just press the Approve sign-in or Hardware Security Key to approve the 2FA of Synology NAS device. The OTP setup is compulsory if you are using any other utilities like mobile apps or software. To setup an OTP, you just have to select the verification code, then enter the password and follow some simple instructions that will shown on the computer screen. You can also approve the two factor authentication by sending a verification email. Let’s see how you can send it.
3. Verify Email Address
Just go to the DSM software and click on the Personal then select the Account. Here you will see the Send verification mail button. Press the button and then check your mailbox. You will find a link in the email, just click on it and verify it.
4. Sign In to DSM by 2FA
After verifying the OTP or Email, you have successfully enabled the 2FA. Then use the Hardware security key or OTP to log in to the DSM of the Synology NAS device.
The Last Words
Here you have learned how to install the DSM with the help of some steps. These steps included connecting the computer in the same network of the Synology device, accessing the web assistant through find.synology.nas or find.synology.com, and installing the DSM. After that we have provided the informative steps to enable the two factor authentication. The 2FA configuration steps included locating the 2-factor authentication, approving security key through OTP and Email and signing in to the DSM by 2FA. We hope that you installed the Synology 2FA on your NAS device successfully.


